How to add valves to copper pipes and How to solder or sweat cop

Tech News

How to add valves to copper pipes and How to solder or sweat cop
Views: 2364  Update Date:Jun 04 , 2017

It is fairly easy to solder or sweat copper pipe. After reading this blog and with a little practice you should be able to do repairs or improvements to your bathroom easily. This blog is useful for those who have read the blog 'How to change a vanity faucet' and would like to add a valve or threaded end for the water lines to attach to or those interested in sweating copper for indoor water lines.
solder copper pipe

The basic idea of sweating copper is the join or weld two pieces of copper piping together. This can be an very easy task or it can be a nightmare. Preparation is all the difference. If the pieces you are fitting are clean and dry it should be easy. If they are dirty then the solder won't stick and if water is in the pipes it won't get hot enough. 
soldering copper pipe

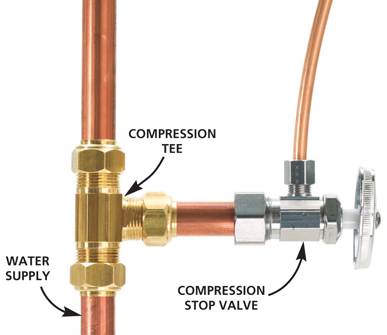
If you are not planning on doing much copper soldering then you are probably better off buy a compression fitting or Shark Bite fitting instead of the tools. Compression fitting are attached by tightening a bolt onto the valve or fitting and the water seal is created by the ring that is compressed between the bolt and the fitting. All you really need are two wrenches to tighten the fitting but it requires a fair bit of strength. Shark bite is a name brand of fittings that just slide on and are called push fittings. These alternatives are more expensive than soldered fittings but not if you have to buy the tools for a one time use. If you are doing or planning to do a lot of plumbing then it is cheaper to go with the solder fittings.
solder copper pipes

soldering copper pipe

Whether you are using solder, compression or push fitting you will most likely need to cut the existing pipes. A small pipe cutter is the best way to go. It is easy to use, fairly inexpensive and usually small enough to get into tight spaces. You also don't have to worry about damaging the pipes or surroundings like you do when using sawing tools. To use the pipe cutter gently tighten the knob on the pipe, spin the cutter around a couple of times, tighten the knob a little, spin the cutter around and keep going until you cut through the pipe.
soldering brass fittings
You will need:
  • 1/2” copper pipe and 12” fittings (note: buy a few extra elbows and couplings to save a trips to the shop) 
  • 1/2” valves with 3/8” threaded fitting (3/8” is standard size for faucet water lines)
  • flux or solder paste
  • solder (use lead-free and make sure it is for copper)
  • grit cloth (plumbing sand paper) or pipe cleaning tool
  • torch
  • pipe cutter

  1. Plan out your work before beginning or even going to the shop. Draw your plumbing plan while looking at the pipes you are planning to work on. Each corner will need an elbow. Long runs and tight areas will need couplings.

  2. Before cutting any pipes you need to turn off the water main and empty to water lines in your house. After shutting off the main open and a set of taps on the lowest level of the house and set of taps on the highest level of the house. This allows water to drain out of the plumbing.

  3. Also open the taps nearest to where you are working this will help drain water out of the area you are working in.

  4. If you need to cut the pipes, cut as little as possible off at first. Cutting it too short can make it difficult to apply heat to without taking special precautions not to damage the surrounding area. (Remember: it is a lot easier to cut a little more off than to solder new on)

  5. When selecting an area to cut use a section of pipe that is clean and free from old solder drips and free from any deformity due to bending or hitting. Old solder drips make it difficult to cut and slide fittings on. Deformities make it difficult to slide fittings on a leave gaps between the fittings.

  6. Use the grit cloth and twist it back and forth over the end of the pipe to by soldered. Make sure you clean about an 1” of the end so that it is shiny. It is difficult to get the solder to stick to any dull areas of copper.

  7. Make sure the inside of the fitting it also clean and there aren't any little pieces of metal inside.

  8. Test fit the fitting onto the copper pipe and make sure it slides all the way on snugly. Continue to build your plumbing system to completion dry fitted. This will ensure that it is possible to do what you want and you can weld or sold the whole system in one shot. The metal gets very hot and very had to work with. Also mistakes are quite difficult to correct once it is soldered wasting time and money. Mistakes usually need to be cut out.

  9. Once the whole system is together double check that your water intakes lines or anything attaching the pipes can reach. Nothing is worse than finishing the welding and then finding out that the water intakes lines are too short. If this does happen you can extend pipes by cutting short pieces into the pipe and attaching with couplings. You can also go back to the shop and buy longer water lines. Both are lost time and money. 

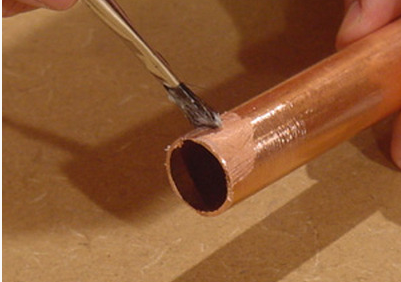
  10. If you are happy with the pipes and fittings take it all apart. Try to organize it so it is easy to put back together. You will need to at flux to the outside of each pipe and the inside of each fitting. Apply with a little brush like you would spread butter on toast. You don't need to cake it on but you want to ensure that the whole area is covered and thick enough to see. 

  11. Take apart the valves and remove the rubber washer from the valves. If you heat the valve with the rubber washers inside you can damage them. You can buy valves that do not need to be dismantled before soldering.

  12. Once the whole system is back together and flux is between every area to be soldered you are ready to heat each fitting and apply to solder. (Note: If you are only adding valves on the end of the two pipes under a vanity the whole system is just to two fittings. I hope that wasn't confusing!)

  13. Start at one end of the system and work your way to the other when soldering. This way the heat from the each weld helps heat up the next weld saving time. Also you won't forgot any. A lot of water comes out of a unsoldered fitting. (Note: open any valves to let heat escape. It also lets you hear the flux boiling)

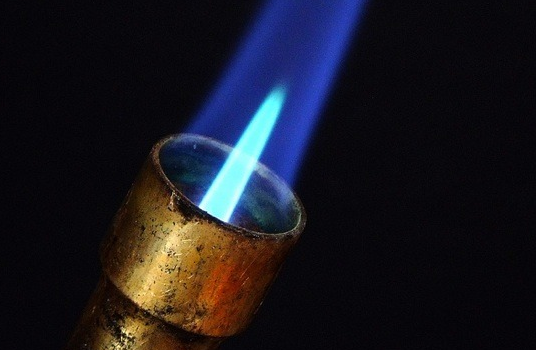
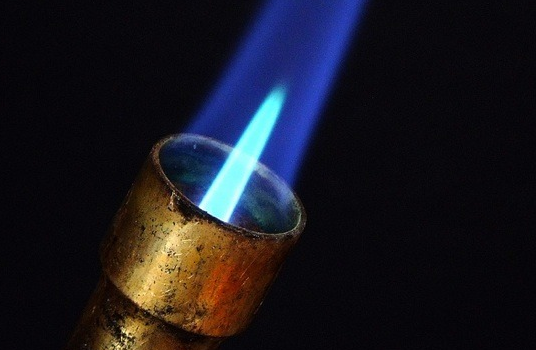
  14. When soldering a fitting heat it up with a torch. Make sure you have a good flame on the torch. About an 1” long inner flame cone is good. You can make it a bit hotter or cooler depending on the space you have. The inner cone in the picture is fine but a little hotter is better.

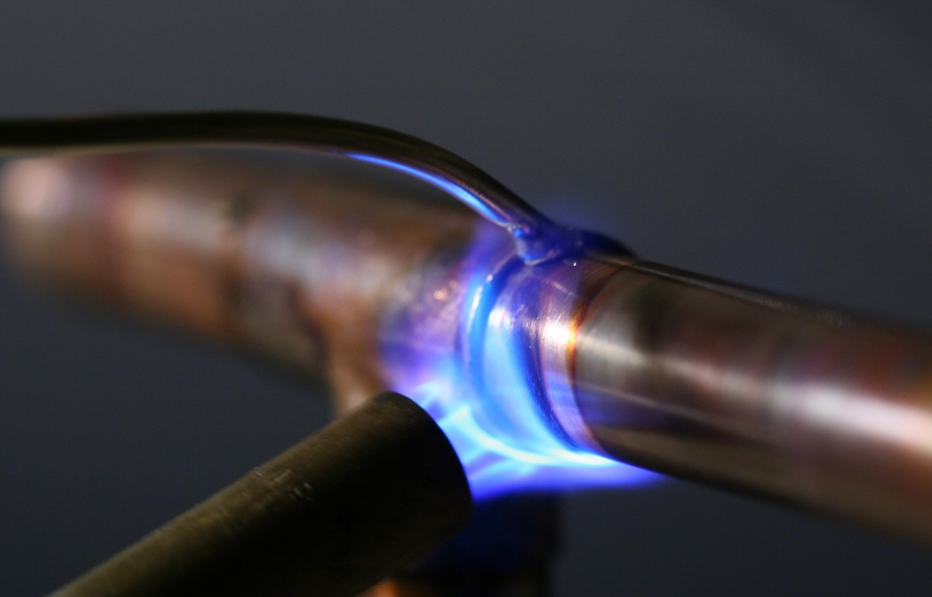
  15. Heat the fitting with the inner cone. You should start to hear bubbling. That is the flux boiling. The idea here is to heat the copper pipe and fitting so that it melts the solder. Do not use the flame to melt the solder.

  16. Test the fitting to see if it is hot enough to melt the solder. Lightly scratch the top of the crack between the fitting and the pipe while holding the flame on the bottom. If it is hot enough the solder should instantly turn to liquid and disappear into the fitting. If it is not hot enough the solder will not melt or it will melt a little and stick. Once the area is hot enough, lightly scratch all around the crack between the fitting and copper pipe filling it with the liquid metal. Once it is full it will start to form a drop on the bottom and drip. Stop right before it begins to form a drop.

  17. You should be able to see the liquid metal all the way around the crack or seam without any gaps. Once filled keep moving along the pipe and solder each end of each fitting. (Note: thinker brass fittings like the valves or threaded nipples will have to be heat for much longer than the copper elbows and couplings.

  18. Once you have finished the whole system let it cool so you can put the valves back together.

  19. Close all the valves and taps. Open the water main and check for leaks. If there are no leaks now then it will be good for decades.

  20. Before turning the water back on shut off the set of taps you open on the lowest and highest level of the house. Air will get trapped in the lines as the water builds pressure. This will clear once you turn the taps on for a few seconds.

Remember: 

  • It's not that hard but the first time won't be perfect. It takes practice to learn it!
  • Expect a leak or two just make sure to shut the water off quickly before too much water leaks out. A bit of water won't hurt anything.
  • When fixing a leak be sure to drain all the water out of the pipes. You may be able to get away with just resoldering the leaky fitting but you may need to cut it out and start again.

Recent News

Choose High-Grade Fittings Directly from Top Brass Fittings Manufacturer
Jul 20 , 2020
Are you looking for top and experienced brass fittings manufacturers, who are bringing to you the best...
Why is brass used in plumbing?
Jul 07 , 2020
Solid joints between two funnels or at the dropping purposes of channels is a fundamental need to guarantee...
The advantages of brass pipes, what are the advantages of brass pipes compared with other pipes?
Jun 13 , 2020
The advantages of brass pipes, what are the advantages of brass pipes compared with other...

Contact

  • Address: Qinggang Industrial Zone,Taizhou,Zhejiang, China
    Email: sales@klikkon.cn
    Mob:+86-13634068027 (24hours service)
    Phone/Fax:+86-13634068027
Top